Throughout this article we will explore creating a system that will allow site visitors to leave "reactions" on Statamic 3 entries. Once complete, users will be able to add the following reactions to entries: 👍 Like, 😍 Love, 😯 Surprised, 🤔 Thinking/Thought Provoking, 😢 Sad, and 😡 Angry. The system we will be building will show what type of unique reactions previous visitors have left on an entry, as well as the total number of reactions.
This article will be making use of Statamic's Starter's Creek Starter Kit, as well as Alpine.js and Tailwind CSS (version 2). If you intend to follow along with this article don't forget to install the NPM dependencies and build a development version of your site's assets after creating a new Starter's Creek site.
1# Run the following commands within the root directory of your project.2 3# Installs the NPM dependencies.4npm run install5 6# Builds a development version of your site's assets.7npm run devAlso be sure to create a Control Panel user to make it easier to make changes to the Starter Kit's blueprints and fieldsets.
#Development Overview
Before we start writing custom PHP code and developing our Antlers templates, lets take a moment to think about what we are going to build. We want to build a system that allows visitors to submit their reactions to a piece of content. At a high level we will have to develop the following pieces in order to make this work:
- Data Storage: A place to store visitor reactions
- Frontend: A user interface to allow users to view and submit reactions
- Backend: The custom PHP code to actually receive and store submitted reactions
#Data Storage: Creating a Fieldset and Updating the Blog Blueprint
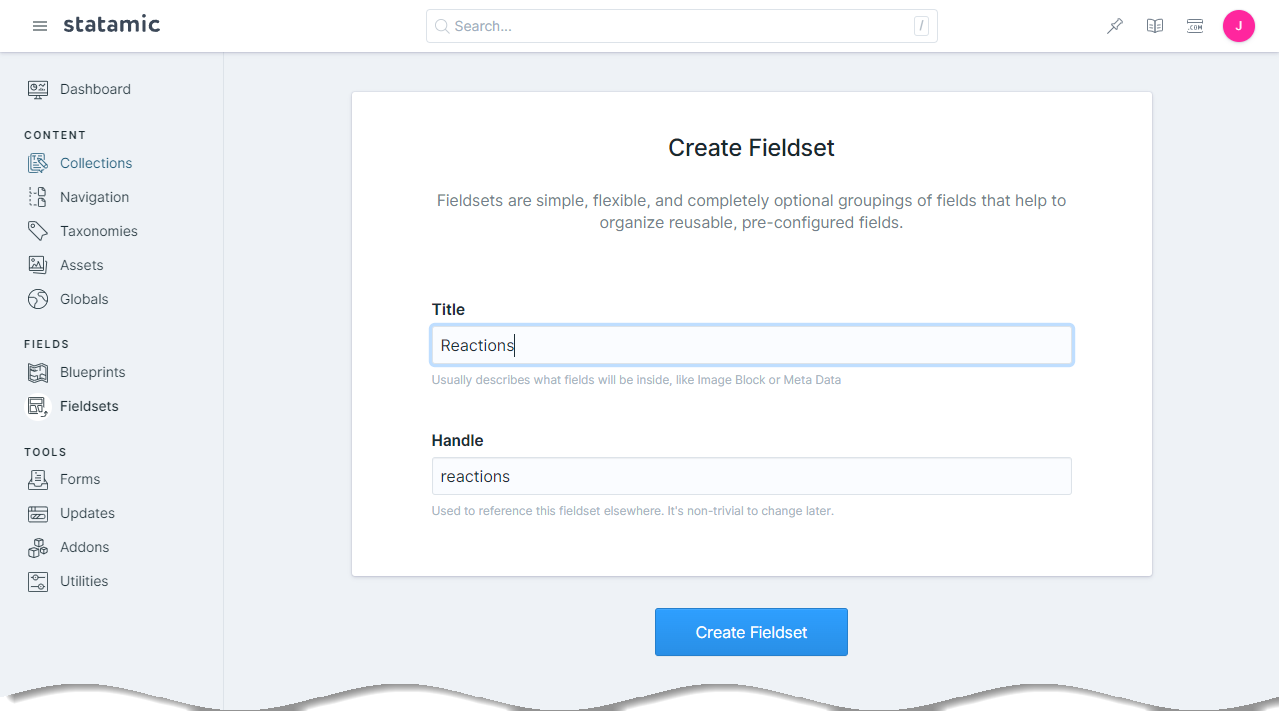
Instead of building up a complicated data storage system, we are going to take advantage of the incredible flexibility that Statamic's blueprints and fieldsets provide. Our data storage format will be created using a fieldset, which will make it simpler to reuse the same set of fields across many blueprints and collections in the future. Within the Statamic 3 Control Panel, select the "Fieldsets" options from the left menu. Once the fieldsets page has loaded, click/tap the "Create Fieldset" option. You will be presented with the "Create Fieldset" form.
To follow along with this article use the following values:
-
Title:
Reactions -
Handle:
reactions
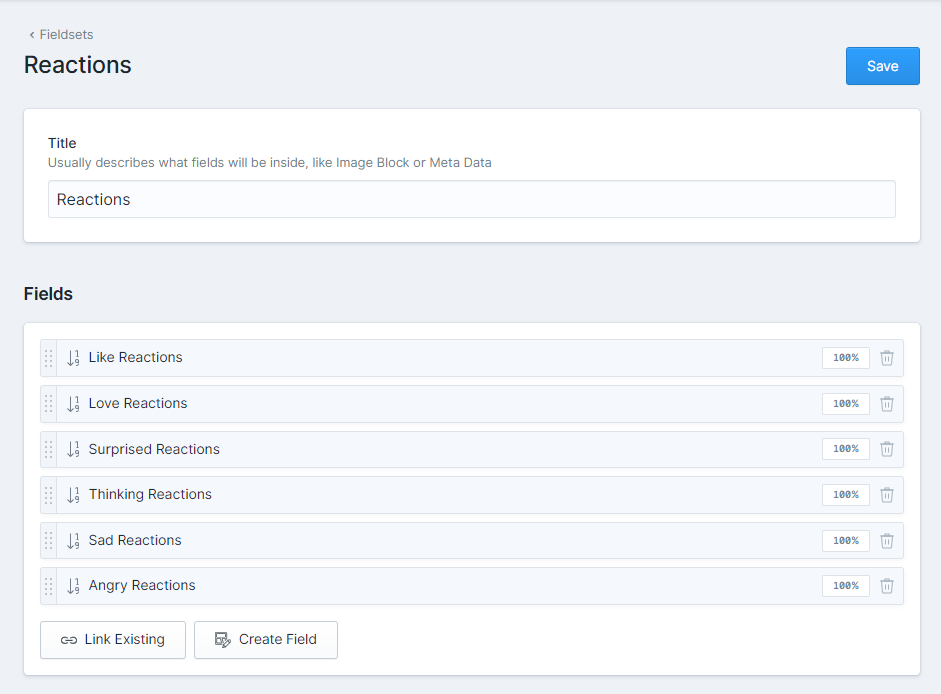
Once the fieldset has been created we will create six integer fields with the following properties in order to store the different types of visitor reactions:
| Display | Handle |
|---|---|
| Like Reactions | like_reactions |
| Love Reactions | love_reactions |
| Surprised Reactions | surprised_reactions |
| Thinking Reactions | thinking_reactions |
| Sad Reactions | sad_reactions |
| Angry Reactions | angry_reactions |
After all six fields have been created, and the fieldset has been saved, the resources/fieldsets/reactions.yaml file should contain contents similar to the following YAML code sample:
1title: Reactions 2fields: 3 - 4 handle: like_reactions 5 field: 6 default: '0' 7 display: 'Like Reactions' 8 type: integer 9 icon: integer10 listable: hidden11 instructions_position: above12 -13 handle: love_reactions14 field:15 default: '0'16 display: 'Love Reactions'17 type: integer18 icon: integer19 listable: hidden20 instructions_position: above21 -22 handle: surprised_reactions23 field:24 default: '0'25 display: 'Surprised Reactions'26 type: integer27 icon: integer28 listable: hidden29 instructions_position: above30 -31 handle: thinking_reactions32 field:33 default: '0'34 display: 'Thinking Reactions'35 type: integer36 icon: integer37 listable: hidden38 instructions_position: above39 -40 handle: sad_reactions41 field:42 default: '0'43 display: 'Sad Reactions'44 type: integer45 icon: integer46 listable: hidden47 instructions_position: above48 -49 handle: angry_reactions50 field:51 default: '0'52 display: 'Angry Reactions'53 type: integer54 icon: integer55 listable: hidden56 instructions_position: aboveNow that we have created the reactions fieldset we will need to update the "Blog" blueprint that ships with the Starter's Creek Start Kit. Select "Blueprints" from menu within the Statamic 3 Control Panel to load the Blueprints page. Once the Blueprints page has loaded, select the "Blog" entry in order to edit the existing Blog blueprint. We are going to create a new Section to store our visitor's reactions named "Reactions" and link the "Reactions" fieldset we just created.
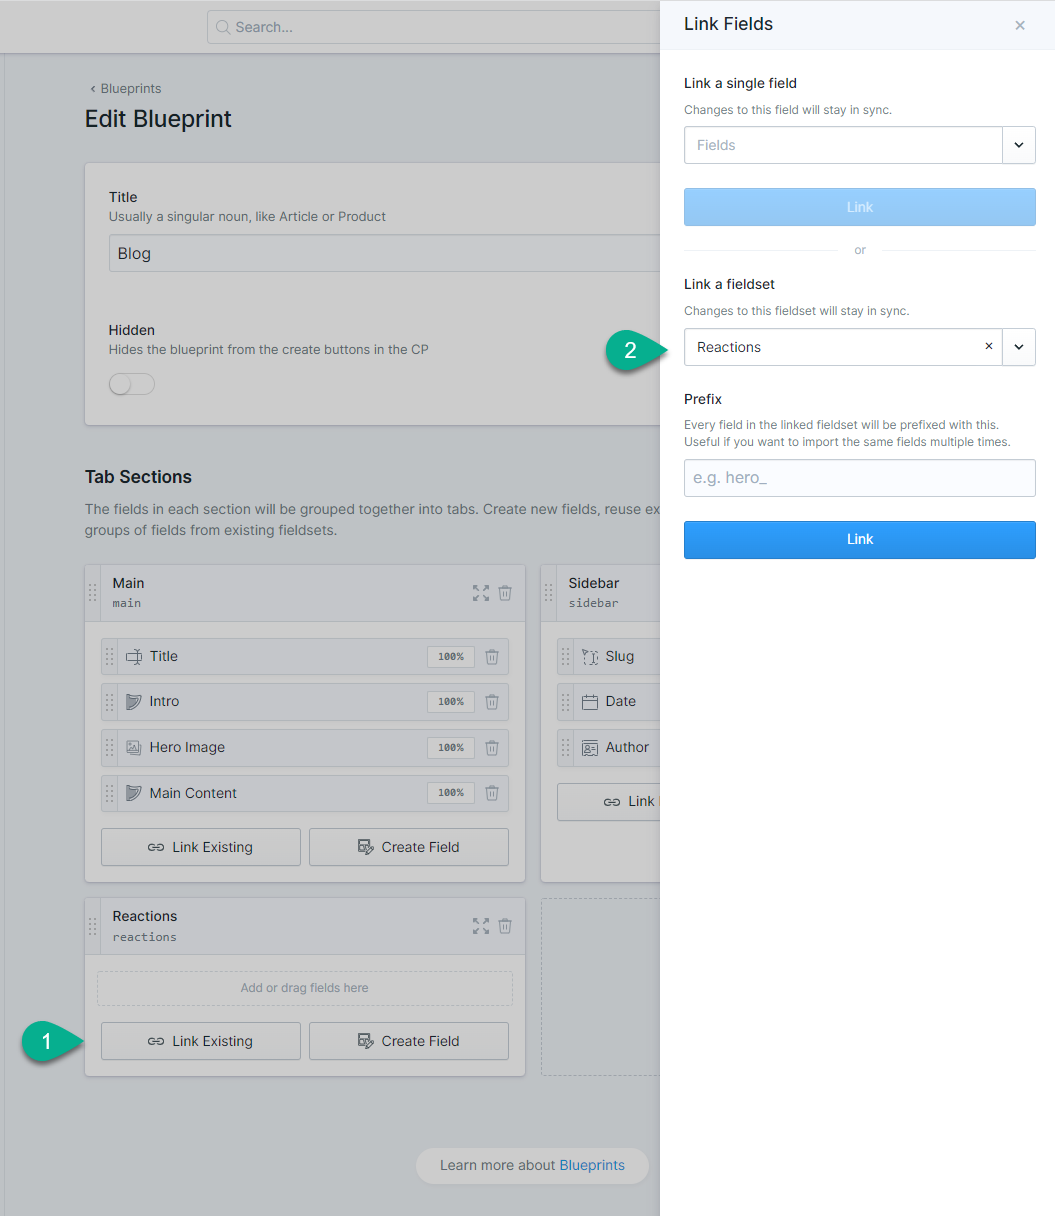
It is important not to enter a prefix when linking the fieldset. Our PHP code to store reactions and Antlers templates will make use of the exact field names we entered when creating the original fieldset. Prefixing the fieldset will change these names when applied to Blog blueprint.
That's all there is to creating the place our visitor reactions will be stored!
#Writing the PHP Code to Store Reactions
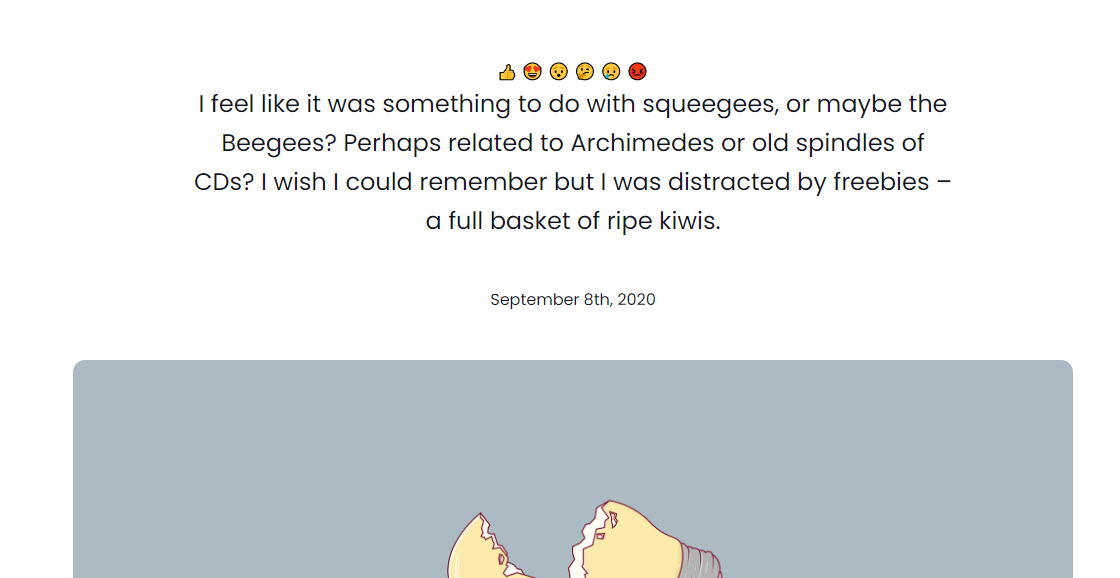
To begin this section we are going to first create a new Antlers partial which will give us a place to start placing our frontend code to test submitting reactions. We will continue updating this partial throughout the article to build out a better user experience. To get started, create a new resources/views/partials/_reactions.antlers.html file with the following contents:
1<form>2 <button type="submit" name="reaction" value="like_reactions">👍</button>3 <button type="submit" name="reaction" value="love_reactions">😍</button>4 <button type="submit" name="reaction" value="surprised_reactions">😯</button>5 <button type="submit" name="reaction" value="thinking_reactions">🤔</button>6 <button type="submit" name="reaction" value="sad_reactions">😢</button>7 <button type="submit" name="reaction" value="angry_reactions">😡</button>8</form>We now want to update the resources/views/blog/show.antlers.html template file to include our partial so we can start experimenting. Update this template file to include the partial below the title variable:
We are also supplying an entry variable to our partial which will contain all of the page data. We won't access entry data directly within our partial, making it reusable in more situations in the future.
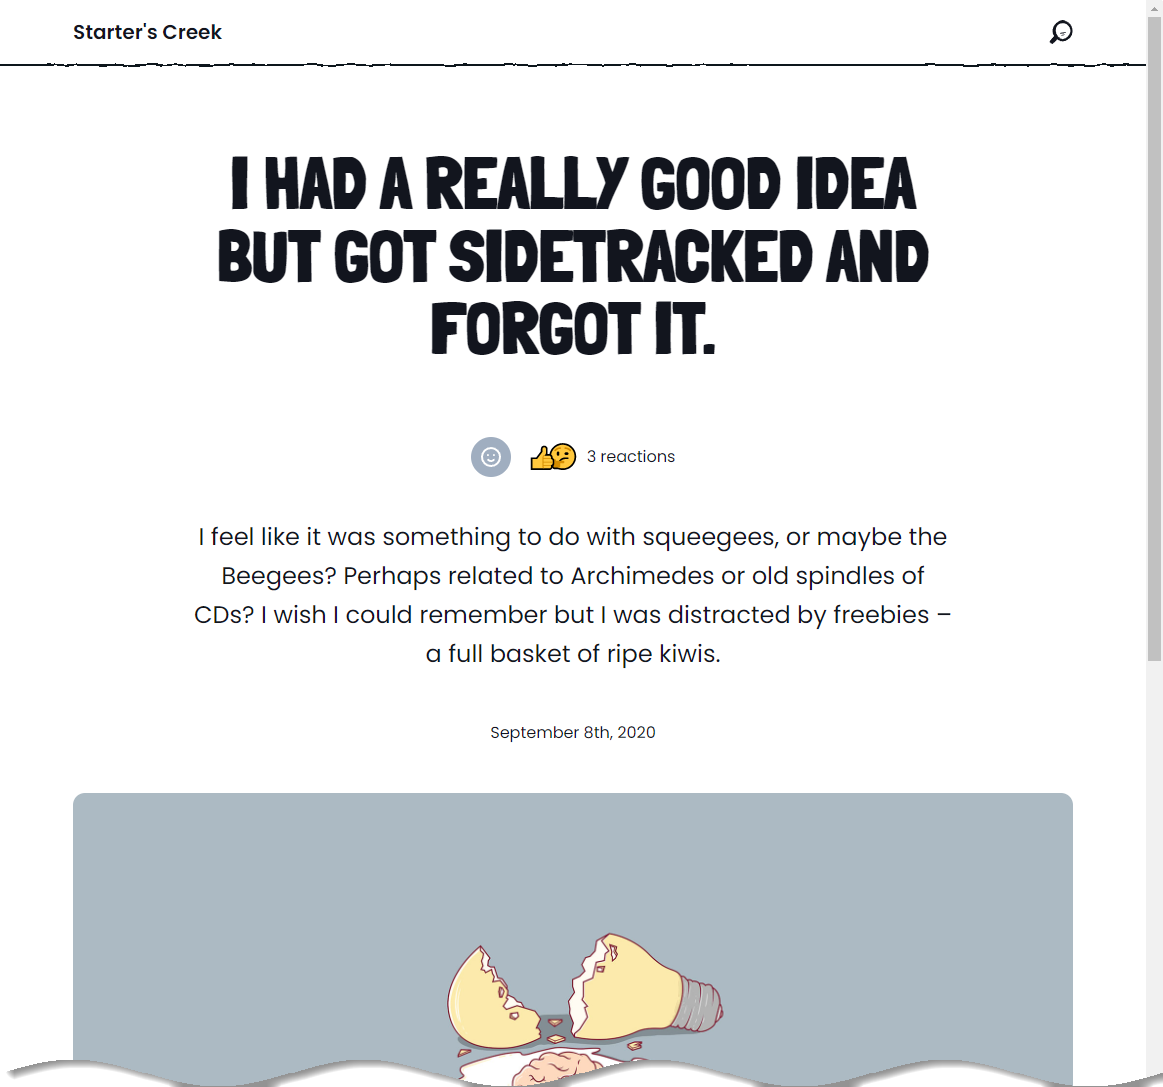
1<article class="max-w-5xl mx-auto px-3"> 2 <header class="mx-auto max-w-3xl text-center content"> 3 <h1>{{ title }}</h1> 4 {{ partial:reactions :entry="page" }} 5 6 {{ intro }} 7 <div class="my-12 flex items-center justify-center"> 8 {{ if author }} 9 <img src="{{ author:avatar ?? author:email | gravatar:160 }}" class="h-20 w-20 my-0 rounded-full mr-4">10 {{ /if }}11 <div class="text-left">12 {{ if author }}13 <div>14 <a class="font-bold no-underline" href="/authors/{{ author:handle }}">15 <span class="bg-clip-text text-transparent bg-gradient-to-r from-hot-pink to-purple-500">16 {{ author:name }}17 </span>18 </a>19 </div>20 {{ /if }}21 <time datetime="{{ date format="Y-m-d" }}">{{ date }}</time>22 </div>23 </div>24 </header>25 <img class="rounded-xl" src="{{ hero_image }}" alt="">26 <section class="max-w-3xl mx-auto py-6 lg:py-12 content">27 {{ main_content }}28 {{ if type == "text" }}29 {{ text }}30 {{ elseif type == "code_block" }}31<pre class="language-{{ mode ?? 'php' }} rounded"><code>{{ code }}</code></pre>32 {{ elseif type == "image" }}33 <figure>34 <img src="{{ image }}" alt="{{ caption }}" />35 <figcaption>{{ caption }}</figcaption>36 </figure>37 {{ /if }}38 {{ /main_content }}39 </section>40 41 {{ if settings:show_signup }}42 {{ partial:sign-up}}43 {{ /if }}44</article>If we load the "I had a really good idea but got sidetracked and forgot it." blog post in our browser, we should see output similar to the following:
Clicking any of the buttons will currently effectively refresh the page with the the value of the reaction button added to our page's URL. It is at this stage that we want to try and submit content reactions and save them. If you are used to "typical" PHP development of creating a file on a web server and navigating to that page (or using the name of a PHP file as form's action), we are going to do something very similar, but utilize a concept called routing.
Since Statamic 3 is built on top of the Laravel framework, we can utilize its routing features in order to "hook up" our HTML buttons and make them "do things" on the backend server. At the highest level, routes give us a way to create a URL and specify what PHP code should be executed when that URL is invoked. Our project's routes are defined within the routes/ directory.
Open the routes/web.php file and update the contents to the following to add a new reactions route:
1<?php 2 3use Illuminate\Support\Facades\Route; 4 5Route::statamic('authors', 'author.index'); 6Route::statamic('authors/{handle}', 'author.show'); 7 8Route::post('reactions', function () { 9 dd('Submission', request()->all());10})->name('reactions.update');The Route Laravel class provides many useful methods to help create routes; in the previous example we are calling the post method to indicate that our URL can only be accessed when browsers submit a request using the POST HTTP verb (we will update our partial's HTML form later to use this as the form's method). The first argument (reactions) tells Laravel the URL must be in order for our function to be called. At the very end, we are also giving our route a friendlier "name" by calling the name method. The name we provide ("reactions.update") can be used later with Statamic's route tag in order to generate the full URL that our form will need.
Let's update the resources/views/partials/_reactions.antlers.html reactions partial again to have the following contents:
Don't forget to add the {{ csrf_field }} line otherwise you will receive 419 Page Expired errors when attempting to submit reactions!
1<form method="POST" action="{{ route:reactions.update }}"> 2 {{ csrf_field }} 3 <input type="hidden" name="entry" value="{{ entry:id }}" /> 4 5 <button type="submit" name="reaction" value="like_reactions">👍</button> 6 <button type="submit" name="reaction" value="love_reactions">😍</button> 7 <button type="submit" name="reaction" value="surprised_reactions">😯</button> 8 <button type="submit" name="reaction" value="thinking_reactions">🤔</button> 9 <button type="submit" name="reaction" value="sad_reactions">😢</button>10 <button type="submit" name="reaction" value="angry_reactions">😡</button>11</form>The changes we just made accomplish the following:
- Sets our form's method to
POSTto match the method we called when defining our route, - Utilizes Statamic's
routetag to generate the URL to the route we created earlier, using the "friendlier" name we gave it in our routes file - Used the
{{ csrf_field }}Statamic variable to output a hidden form field containing a CSRF token - Created a hidden
entryHTML field containing our entry's identifier as its value
Refreshing the blog post and clicking on the "Like" button should now call our PHP function within the routes file and produce output similar to the following:
1"Submission"23array:3 [4 "_token" => "some_token_value"5 "entry" => "3929d74a-53bd-498a-a8cb-4ba58b8081f1"6 "reaction" => "like_reactions"7]To actually store the reaction on our entry we will need to accomplish the following:
- Retrieve the Statamic entry
- Get the current value for the reaction to save and increment it by
1 - Set the new reaction value
- Save the Statamic entry
Statamic provides a helpful Statamic\Facades\Entry façade, which contains useful methods that will allows us to find entries through by their identifier, slug, etc. We will be using the method that allows us to find an entry by its id (which we are sending as part of our form's POST request, through the entry hidden field). Lets update our routes/web.php file to contain the following contents:
Don't forget to add the use Statamic\Facades\Entry; at the top of the file! Without this you may receive a Class 'Entry' not found error.
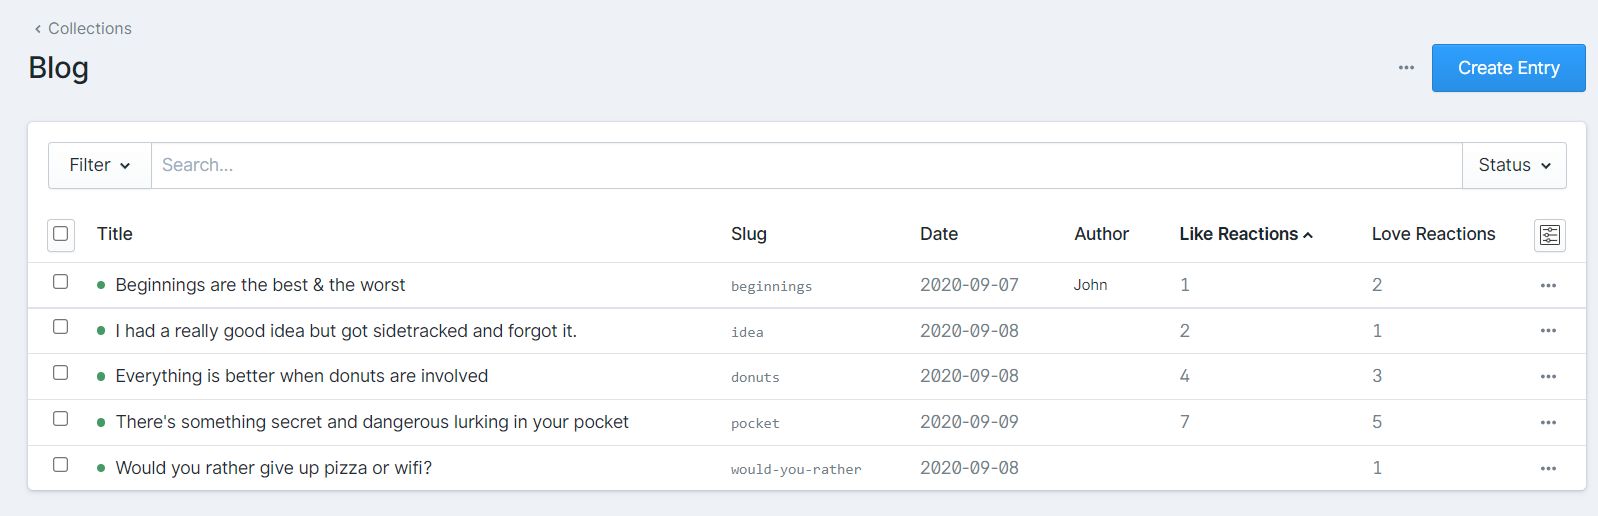
1<?php 2 3use Illuminate\Support\Facades\Route; 4use Statamic\Facades\Entry; 5 6Route::statamic('authors', 'author.index'); 7Route::statamic('authors/{handle}', 'author.show'); 8 9Route::post('reactions', function () {10 // A list of the valid reactions we allow.11 // These will match our button values and12 // and the names of our fieldset fields.13 $validFields = [14 'like_reactions',15 'love_reactions',16 'surprised_reactions',17 'thinking_reactions',18 'sad_reactions',19 'angry_reactions',20 ];21 22 // Asks Statamic to find the entry with the ID submitted.23 $entry = Entry::find(request()->get('entry'));24 25 // Gets the type of reaction to update on the entry.26 $reaction = request()->get('reaction');27 28 // Ensures the entry actually exists, and the submitted reaction is valid.29 if ($entry != null && in_array($reaction, $validFields)) {30 // Retrieves the current value for the reaction type.31 $currentValue = $entry->get($reaction, 0);32 33 // Sets the new value on the entry.34 $entry->set($reaction, $currentValue + 1);35 36 // Asks Statamic to save the entry's contents.37 $entry->save();38 }39 40 // Return the visitor to the URL they just came from.41 return redirect()->to(url()->previous());42})->name('reactions.update');With these PHP code changes in place submitting revisions by clicking the form buttons on the blog entry should now update the entry's actual contents. To verify, you can locate an entry within the content/collections/blog/ directory. As an example, submitting a few reactions added the following values to the 2020-09-08.idea.md file while writing this article:
1like_reactions: 22love_reactions: 13surprised_reactions: 1These values may also be viewed within the Statamic 3 Control Panel by adjusting what fields are displayed on the Blog collection's table, or by viewing the entry itself within the Control Panel.
At this point, we can submit content reactions but are unable to see how many reactions have already been submitted, or what "kind" of reactions have already been submitted by other visitors. We will tackle these items throughout the remainder of this article.
#Refactoring our Partial Using Antlers Front-Matter
Taking a look at the current state of our Antlers partial, we can see a lot of duplicate code starting to emerge. This problem will only get worse over time since we will be referencing those field names in a few places: once to create the buttons to submit a reaction, and again to indicate what kinds of reactions have already been left.
1<form method="POST" action="{{ route:reactions.update }}"> 2 {{ csrf_field }} 3 <input type="hidden" name="entry" value="{{ entry:id }}" /> 4 5 {{# Lots of duplicate code here. #}} 6 <button type="submit" name="reaction" value="like_reactions">👍</button> 7 <button type="submit" name="reaction" value="love_reactions">😍</button> 8 <button type="submit" name="reaction" value="surprised_reactions">😯</button> 9 <button type="submit" name="reaction" value="thinking_reactions">🤔</button>10 <button type="submit" name="reaction" value="sad_reactions">😢</button>11 <button type="submit" name="reaction" value="angry_reactions">😡</button>12</form>To clean this up we are going to take advantage of Antlers view front-matter, which will allow us to specify a list of the common things we want to use in our partial (in our case, we are going to create a list of the types of reactions visitors can submit). Because YAML can be quite verbose, we are going to also utilize its shorthand dictionary syntax to be as concise as possible:
1--- 2reactions: [ 3 { title: 'Like', display: '👍', field: 'like_reactions' }, 4 { title: 'Love', display: '😍', field: 'love_reactions' }, 5 { title: 'Surprised', display: '😯', field: 'surprised_reactions' }, 6 { title: 'Thinking', display: '🤔', field: 'thinking_reactions' }, 7 { title: 'Sad', display: '😢', field: 'sad_reactions' }, 8 { title: 'Angry', display: '😡', field: 'angry_reactions' }, 9]10 11---12 13<form method="POST" action="{{ route:reactions.update }}">14 {{ csrf_field }}15 <input type="hidden" name="entry" value="{{ entry:id }}" />16 17 {{ view:reactions }}18 <button type="submit" name="reaction" value="{{ field }}">{{ display }}</button>19 {{ /view:reactions }}20</form>Granted our Antlers file is larger than it was before, but we also now have a single location to update the list of valid reactions, what emoji should be displayed, as well as a few other properties we can use later. We have also removed all of our hard coded buttons and are now generating them dynamically by iterating over the reactions array we specified within our partial's front-matter (all front-matter variables must be prefixed with view:). Refreshing our blog post page in the browser should produce identical output to the hard coded version.
#Building the Reactions Widget
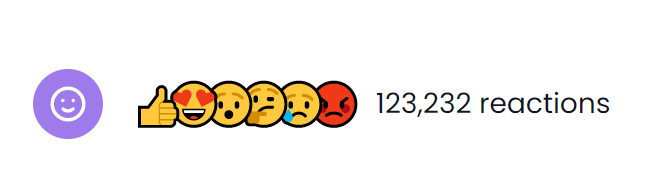
The user interface we will work on building will utilize Alpine.js and Tailwind CSS version 2 (both of which are preconfigured with the Starter's Creek Starter Kit). When visitors initially view our blog post page, they will see this version of the reactions widget:
Visitors will then be able to click on the purple smiley face to the left to "open" the reactions widget to submit their own reaction (they will also be able to click the "X" button to close the widget and cancel submitting a reaction):
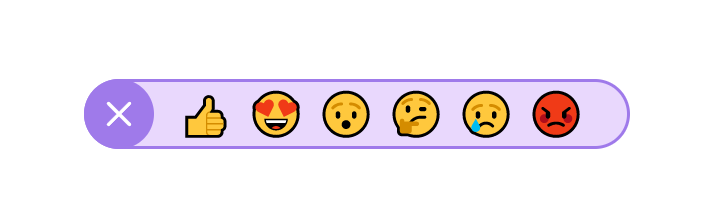
The emoji that are displayed in both the open and closed modes will come from the front-matter variables we created earlier. The smiley face and "X" button are SVG images from Heroicons.
The changes we will make next will create a "dropdown" menu using Alpine.js and a number of Tailwind CSS classes. We will move our buttons to only be displayed when a user clicks on the purple smiley face:
1--- 2reactions: [ 3 { title: 'Like', display: '👍', field: 'like_reactions' }, 4 { title: 'Love', display: '😍', field: 'love_reactions' }, 5 { title: 'Surprised', display: '😯', field: 'surprised_reactions' }, 6 { title: 'Thinking', display: '🤔', field: 'thinking_reactions' }, 7 { title: 'Sad', display: '😢', field: 'sad_reactions' }, 8 { title: 'Angry', display: '😡', field: 'angry_reactions' }, 9],10 11---12 13<div x-data="{ dropdownOpen: false }" class="mb-10">14 <div class="flex justify-center mt-10">15 <button @click="dropdownOpen = !dropdownOpen"16 class="flex relative w-10 h-10 bg-purple-50017 cursor-pointer justify-center items-center18 mr-4 rounded-full text-xl text-white z-10"19 :title="dropdownOpen ? 'Cancel' : 'Add Reaction'">20 <!-- Hericon name: emoji-happy -->21 <svg xmlns="http://www.w3.org/2000/svg" class="h-6 w-6" fill="none" viewBox="0 0 24 24" stroke="currentColor" x-show="!dropdownOpen">22 <path stroke-linecap="round" stroke-linejoin="round" stroke-width="2" d="M14.828 14.828a4 4 0 01-5.656 0M9 10h.01M15 10h.01M21 12a9 9 0 11-18 0 9 9 0 0118 0z" />23 </svg>24 <!-- Heroicon name: x -->25 <svg xmlns="http://www.w3.org/2000/svg" class="h-6 w-6" fill="none" viewBox="0 0 24 24" stroke="currentColor" x-show="dropdownOpen">26 <path stroke-linecap="round" stroke-linejoin="round" stroke-width="2" d="M6 18L18 6M6 6l12 12" />27 </svg>28 </button>29 30 <div x-show="dropdownOpen">31 <form method="post" action="{{ route:reactions.update }}"32 class="flex relative h-10 z-0 border-purple-500 border-233 bg-purple-200 rounded-full justify-center34 items-center -ml-14 pl-12 pr-5">35 {{ csrf_field }}36 <input type="hidden" name="entry" value="{{ entry:id }}">37 {{ view:reactions }}38 <button type="submit" name="reaction" value="{{ field }}"39 class="flex relative w-10 h-10 justify-center40 items-center text-2xl cursor-pointer"41 title="{{ title }}">{{ display }}</button>42 {{ /view:reactions }}43 </form>44 </div>45 46 <!-- TODO: Reaction view. -->47 48 <!-- TODO: Reaction count. -->49 </div>50</div>Refreshing our blog article's page should now allow us to click on the purple smiley face to show the available reaction options, as well as dismiss those options:

Our next task will be to conditionally display any previously submitted reactions. Our user interface will only show the reaction's corresponding emoji if a previous visitor has already submitted that reaction. To get started, replace the <!-- TODO: Reaction view. --> in your partial with the following:
1<div :class="dropdownOpen ? 'hidden' : 'flex'" class="relative h-10 items-center ml-5">2 {{ view:reactions }}3 {{ if entry[field] > 0 }}4 <div class="flex relative w-10 h-105 -ml-6 justify-center6 items-center text-2xl" title="{{ title }}">{{ display }}</div>7 {{ /if }}8 {{ /view:reactions }}9</div>With the new addition we are iterating the same view:reactions variables we used to create the buttons to submit new reactions. However, instead of creating buttons to submit a new reaction, we are checking if the current entry has the corresponding field value, and ensure its value is greater than 0. Submitting some reactions and refreshing the page would now only show those reactions that have been submitted previously.

If we compare our new output to the example earlier in this section, we can see that all of the emoji to the left are now underneath the ones to the right. For our particular use-case, we want the ones on the left to be on top. Looking at the output, we already know that the items that appear on the right will be on top. We can take advantage of this and use Statamic's reverse modifier to reverse the order of the view:reactions array. Doing this will now have the "like" reaction emoji appear on top (since it is now on the right). Reversing just the view:reactions array would produce the results on the left in the following example. As you can see, the emoji are also now in the wrong visual order (but in the correct "stacked" order). We can solve this new problem by reversing the visual order using Tailwind CSS's flex-row-reverse class on the container element to produce the output you see on the right:

The Antlers and CSS code changes make our addition now look like the following Antlers code sample:
The reverse="true" syntax below may look like a tag parameter, but it is actually Antlers' array/tag parameter modifier syntax. The value true for this modifier is completely arbitrary, as it is only used to get the reverse parameter "to stick". Other modifiers may parse these values, however, so always be sure to check the documentation.
1<div :class="dropdownOpen ? 'hidden' : 'flex'" 2 class="relative flex-row-reverse h-10 items-center ml-5"> 3 {{ view:reactions reverse="true" }} 4 {{ if entry[field] > 0 }} 5 <div class="flex relative w-10 h-10 6 -ml-6 justify-center 7 items-center text-2xl" title="{{ title }}">{{ display }}</div> 8 {{ /if }} 9 {{ /view:reactions }}10</div>#Implementing the Reaction View Count
We are almost done with our content reactions system, but still need to implement the existing reaction count so that visitors can see the number of previously submitted reactions. We will implement this using a custom tag.
We are using a custom tag since our variables we need to access are of the form entry:like_reactions, entry:love_reactions, etc. Having the : character in our variable path will, at the time of writing, make utilizing Statamic's addition operators difficult to work with.
To generate the custom tag scaffolding, issue the following command from the root of your project:
1php please make:tag ReactionCountIf you do not want to use the command line to generate the scaffolding, simply create a new file at app/Tags/ReactionCount.php before continuing.
Once the tag file as been created, open the app/Tags/ReactionCount.php file and update its contents to the following:
1<?php 2 3namespace App\Tags; 4 5use Illuminate\Support\Arr; 6use Statamic\Tags\Tags; 7 8class ReactionCount extends Tags 9{10 public function index()11 {12 $validFields = [13 'like_reactions',14 'love_reactions',15 'surprised_reactions',16 'thinking_reactions',17 'sad_reactions',18 'angry_reactions',19 ];20 21 $values = $this->params->get('from');22 23 $total = 0;24 25 // Protect against null values, and non-arrays.26 if ($values != null && is_array($values)) {27 foreach ($validFields as $field) {28 // Each entry will be an instance of Statamic\Fields\Value.29 $value = Arr::get($values, $field);30 31 if ($value != null) {32 $total += intval($value->raw());33 }34 }35 }36 37 return number_format($total);38 }39 40}Our tag will accept a from parameter, which will contain the entry data we want to pull the existing reaction counts from. To make things easier on ourselves, and reduce the amount of duplicate code, we are iterating a list of all valid reaction fields that could exist.
Within this loop, we are using the Arr::get helper method to pull any existing value from the data supplied from our Antlers template. We then must check if the value is null or not (since any reaction types that have not been submitted may return null). Since we are accessing this data from the context of our Antlers template, the values we retrieve will be an instance of Statamic\Fields\Value.
Once we know that our retrieved value is not null, we call the raw method on it value since we do not care about any augmented values for our simple integers. Additionally, we are supplying that value to PHP's intval function to ensure that whatever value we retrieve actually is an integer.
Finally, at the end of tag's implementation we return the formatted, accumulated, total.
Back within our resources/views/partials/_reactions.antlers.html partial, replace the <!-- TODO: Reaction count. --> section with the following:
The :from="entry" syntax when supplying our entry variable as a parameter's value is called dynamic binding. When the Antlers engine encounters dynamic bindings, it passes along the actual value of whatever variable is being referenced within the parameter's value. Without it, our tag would simply receive the string value entry, instead of an array.
1<span :class="dropdownOpen ? 'hidden' : 'flex'"2 class="relative justify-center items-center">3 {{ reaction_count :from="entry" }} reactions4</span>Refreshing our blog page we can now see all the previously submitted reaction types, as well as the total count of all reactions.
#Wrapping Up
Throughout this article we covered a number of intermediate-to-advanced topics. We created our own custom Laravel route to update our blog's entries when a visitor submits a new reaction.
Additionally, we implemented an interactive user-interface utilizing Alpine.js, Tailwind CSS version 2, and utilized Antlers to take care of most of the logic (apart from client-side interactivity). We also created a custom Antlers tag to calculate the total number of reactions a blog post has received.
∎
